Vegetables

We grow a range of vegetables and we try different types each year.  We often sell various items to a few local people and some restaurants.

Potatoes

When you look at a potato, what do you see?  Probably just a potato, right?


Storing Potatoes in the Kitchen

It’s often been said that potatoes can’t be put in the fridge. People will tell you things like ‘activating the starch’ and damaging the vitamin contents or that spuds might even release a harmful chemical if kept too cold.


It’s been revealed by food waste experts at the Waste and Resources Action Programme (WRAP) that actually, the fridge is the best place for them and concerns about chemicals have been found to be untrue in studies.

Normally potatoes only keep for one to two weeks in cupboards but in the fridge, this is said to be three times longer, meaning two weeks turns into six weeks, four weeks longer.

Tomato leaf curl
Tomato leaf curl

Tomato

Tomatoes have fairly delicate roots and they can be easily damaged when moved into a new location.

Leaf curl

If the plant has received too much sun or heat the leaves are likely to curl but will turn to normal later in the evening or if the heat dies down.

Rhubarb

Rhubarb is a vegetable even if it is treated as a fruit.

Rhubarb Problems


4 Reasons Why Your Rhubarb Is Thin and Spindly
 
3–4 minutes
 
Rhubarb is a perennial vegetable that’s grown for it’s juicy, plump stalks. The stems are tart and sweet, and used in pies, jams, compotes, and other dishes.

Because these stems are only part of rhubarb we can eat (the leaves are toxic) it can be disappointing to see our rhubarb plants growing not-so-succulent stalks.

Fortunately, there are four likely reasons why you’re getting lower yields from thin and spindly rhubarb stalks, which are not difficult to resolve.

1. Your rhubarb is getting too large and needs to be divided
The most common reason for rhubarb having thin, spindly stalks is that the plant itself has gotten too large and mature. It seems counter-intuitive, but for rhubarb, a massive plant is the same problem as overcrowding with other plants (which is another cause of thin stalks).

By digging up and dividing your overgrown rhubarb, and replanting each new plant separately, you’re giving extra breathing room for your rhubarb. Rhubarb should be divided every 6 years or so, and it should be done in fall or very early spring.

When dividing rhubarb, each new plant should have a good amount of roots attached in order to ensure it survives transplant shock.

2. Your rhubarb is too young and needs time to get established
The second most common reason for thin rhubarb stalks is that your rhubarb plants are too young. A rule of thumb is that it takes about 2 years before a rhubarb plant is established and grows out full-sized stalks. 

This rule applies to newly divided rhubarb plants as well.

3. Your rhubarb is lacking nutrients
Another reason why your rhubarb stalks are on the thin side is that they are lacking enough nutrients. Nitrogen or potassium deficiencies can cause stalks be thin and sparse. Nitrogen is important for stem and leaf growth, while potassium is important for, among many things, growing stronger stems and branches.

If you’ve eliminated the possibility of your rhubarb being overgrown or too young, apply fertilizer around the base of your rhubarb. Any all-purpose fertilizer will work, whether it’s a 4-4-4 organic fertilizer or a conventional 24-8-16 liquid plant food.

For example, a 10-10-10 all-purpose fertilizer can be applied at 1/2 cup per plant, worked into the surrounding soil. Avoid applying fertilizer directly on the crown (central part) of your rhubarb plant. The best time to fertilize rhubarb is in early spring before the main growth starts.

4. The variety of rhubarb you’re growing has naturally thinner stalks
It’s possible that your rhubarb is one of the thinner-stalked varieties, as some types of rhubarb have thicker stalks than others.

For example, Cherry Red, Riverside Giant (green variety), and Mammoth Red will all produce very thick, succulent stalks. Meanwhile, Canada Red will yield tasty yet more slender stalks.

In the end, it could very well be a combination of factors causing your rhubarb to be thin and spindly. If your rhubarb variety naturally has medium or slender stalks, and it’s also overgrown and needs to be divided, it might make your stalks seem significantly more spindly than they should be.
 
 It's 'the one thing you'll want to continue to do with your plants' – they need a general fertilizer in spring  and phosphorus-rich fertilizer like blood meal in fall. The phosphorus 'helps establish the root base so it [the rhubarb] can get through the winter'. 


Rhubarb should be planted in a spot that's shaded from hot afternoon sun, in deep, rich soil that's well-drained. The tops of the plants should be just at the soil line. New rhubarb should not be harvested until the second year. Once it's mature you can harvest stalks by pulling them from the plant. Continue harvesting until only slender stalks are left. If you cut the stalks off the plant, you'll leave a stub that's prone to decay and may encourage disease in the crown of the plant. You should remove the dying stalks and destroy them. If the roots are healthy they'll produce new leaves. If they've rotted because of soggy soil, no new leaves will be produced and the plants should be replaced.


Mulching
Every spring, apply a mulch of well-rotted garden compost in a layer about 7cm (2½in) deep around rhubarb plants, but take care not to bury the crown. Mulching helps to retain moisture in the soil.
Overwintering
Allow the foliage to die back naturally in autumn, then cut away the old leaves to expose the growing points to winter cold. There is no harm in adding these leaves to the compost heap, as the poisonous oxalic acid contained in them breaks down during decomposition.

Rhubarb requires seven to nine weeks of cold weather below 3°C (37°F), depending on the cultivar.
Dividing large plants
It’s best to divide established clumps of rhubarb every five years or so, especially if they have become overcrowded or growth is weak. This will also give you vigorous new plants for your own garden or to share with friends. The resulting plants are exact clones of the parent.

Lift the dormant crown between autumn and early spring – ideally in November.

Use a spade to divide the crown into several smaller sections, each with a portion of the rhizome (thickened root) and at least one growing point or bud. Sections from the outer part are better than the centre of old plants. Discard any old or decayed parts of the crown. Replant straight away or wrap in damp sacking until ready to plant.
Remove flower stalks
Remove the whole flower stalk as soon as it appears, to prevent it weakening the plant. Some cultivars are more prone to flowering than others, and it is more common after a wet summer or if a high nitrogen feed has been overused.

You can start harvesting early cultivars from March or April, and maincrop cultivars from late April or May. You can then continue picking new stems throughout the summer, as required. The last harvest is usually in late summer, around July or August, although growth may have stopped before this if the weather is very hot.

With newly planted rhubarb, resist the temptation to harvest any stems in the first spring/summer, then harvest only lightly in the second year, to avoid weakening the crown. From seedling plants, start harvesting lightly from the second spring.

Stems should be pulled rather than cut, to avoid leaving a stump that can rot. Harvest when they are 23–30cm (9–12in) long, holding them at the base and pulling gently outwards. Take no more than half the total stems at any one time.

A 3m (10ft) row of rhubarb plants can provide a harvest of about 4½–13½kg (10–30lb). 


Marvel of Venice

Marvel of Venice beans can be used whole when fresh in both raw and cooked preparations. Additionally, bean pods can be left on the vine to fully mature and dry out then the inner beans removed and utilized as a dried or shelling bean. Marvel of Venice ans can be braised, steamed, simmered, grilled, deep-fried and sautéed. Add lightly cooked or raw beans to salads or serve alongside dips as a crudités. The beans offer a meaty texture when cooked and can stand up to prolonged cooking preparations making them an excellent addition to stews, soups or served braised as a side dish. Their flavour pairs well with tomatoes, garlic, shallots, fennel, lemon, dried red chilli, olive oil, balsamic vinegar, fresh herbs, butter, pancetta, hazelnuts, pecorino and parmesan cheese. Beans will keep best if stored in a plastic bag, refrigerated and used within five to seven days.

 When young the bean pod is edible in its entirety and offers a sweet bean flavor and tender yet meaty texture. Look for fresh beans whose pods are firm and unblemished, beans should be crisp and snap when you break off the tip of the pod.

Tender and buttery, these flat beans grow ready for harvest early in the season and are stringless when picked young.

Hot Chilli Pepper Basket of Fire F1

Hot Chilli Pepper Basket of Fire F1. A stunning UK bred F1 variety delivering a bushy growing habit of 30cm tall with a spread up to 50cm making it perfect for hanging baskets and containers alike. The main attraction is the huge crop of small, medium to hot chilies (70,000-80,000 Scoville) which mature from deep purple through yellow and orange to a bright shade of scarlet red, creating a fabulous display. With stands cooler UK temperatures outdoors better than most, whilst equally at home under glass.

Cultivation Advice Hot Chilli Pepper Basket of Fire F1

Days to Germination: 10-21

Optimum Soil Temp. for Germination: 70F+

Days To Harvest: 100

Planting Depth: 1/4in Spacing, Plant: 12 inches

Light: Greenhouse / Conservatory

  • Sow seeds 1/4″ deep in 3in pots with quality soil based seed compost from early spring.
  • Keep moist. Seedlings emerge in 10-21 days at 70degrees F+.
  • Temperature is critical for germination.
  • Transplant to individual containers when seedlings have at least two pairs of leaves.
  • When 4-5 inches plant 12″ apart in greenhouse / conservatory with root ball 1/2″ below the soil surface.~
  • Keep moist and feed when flowering with tomato type fertiliser.
  • Harvest when fruits have reached full-size and full colour.

Black Moon F1 Tomato

Its outstanding taste and texture beat the legendary ?sungold? in taste tests. fruits have firm, juicy, dripless interiors with a black skin that ripens to orange-red. brix is around 8-9%, offering a perfect balance of sweet and tangy flavors.

Cultivation advice Tomato Black Moon F1
sow in spring 1/16 inch deep in fine seed grade compost. germination takes around 6-14 days at 65-75 f. transplant the seedlings when large enough to handle into 3 inch pots. grow on under cooler conditions and when about 8 inches tall, either plant in their growing position in the greenhouse or gradually acclimatise them to outdoor conditions and plant out 18 inches apart in a warm and sunny spot in moist, fertile well drained soil and keep watered.

AI version

Black Moon F1 Tomato: Growing Tips, Care, and Fruit Description

Black Moon F1 Tomato is a fascinating variety that thrives in greenhouse environments, offering a bountiful yield, impressive size, and unique characteristics. When it comes to growing this exceptional tomato, there are a few key factors to consider.

The first step in successfully cultivating Black Moon F1 Tomato is to ensure a suitable greenhouse environment. These plants prefer warm and sunny conditions, so choose a location that receives ample sunlight throughout the day. Additionally, maintaining a consistent temperature between 70-80°F (21-27°C) is crucial for optimal growth.

Proper care is essential for the healthy development of Black Moon F1 Tomato plants. Regular watering is necessary to keep the soil moist, but be cautious not to overwater as it can lead to root rot. Mulching around the plants helps retain moisture and suppresses weed growth, promoting a thriving tomato crop.

Black Moon F1 Tomatoes are known for their impressive size, with fruits reaching up to 8 ounces (227 grams) in weight. These tomatoes feature a striking deep purple color that almost appears black, hence the name. The dark hue intensifies as the fruits ripen, adding a visually stunning touch to your garden or greenhouse.

When it comes to taste, Black Moon F1 Tomatoes offer a delightful balance of sweetness and acidity. They are perfect for adding depth to salads, sandwiches, or even enjoying on their own. The rich flavor and juicy texture make them a favorite among tomato enthusiasts and culinary enthusiasts alike.

Whether you are an experienced grower or just starting your tomato-growing journey, Black Moon F1 Tomato is a captivating variety that will surely impress. Its striking appearance, generous yield, and delectable taste make it a must-have addition to any greenhouse or garden. Start growing this extraordinary tomato today and enjoy the rewards of your efforts!

How to grow salsify


Getting Started
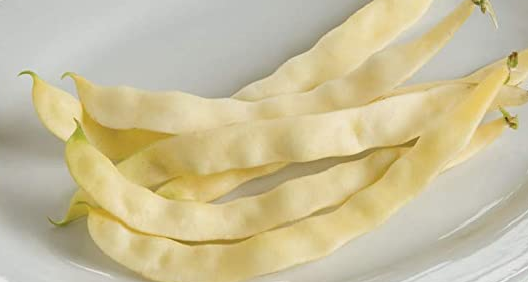
Little-known but easy to grow, salsify produces long, slender, delicately oyster-flavoured roots. These are rarely available to buy, so to enjoy this unusual vegetable, sow outdoors in spring, in the ground or in deep containers, for harvests throughout the winter.


What and where to buy
Salsify seeds are available in some garden centres and from online seed suppliers. You may also find the variety ‘Sandwich Island Mammoth’ (or just ‘Mammoth’), which produces larger roots with an improved flavour.
Recommended Varieties
Has strongly flavoured roots and smooth skin.
Rough brown skin with creamy white flesh, similar to a long thin parsnip.
Sow salsify outdoors in its final growing site, once the soil starts to warm up in April or May. Avoid transplanting, as that can cause the roots to fork.  

Choose a sunny location with light, free-draining soil that is deep enough to accommodate the long roots, which can grow up to 30cm (1ft). Remove as many stones as possible, and break up heavy soil with a fork, adding garden compost to improve its structure.  

Soil that is stony or has recently been manured can cause the roots to fork, in a similar way to carrots and parsnips.  

Sow seeds thinly in shallow drills, 1cm (¼in) deep, with 30cm (1ft) between rows. Always use fresh seeds, as germination rates decline quickly, in a similar way to parsnip seeds. Be patient, as germination to be slow and erratic, taking two or three weeks. When the

seedlings are large enough to handle, thin them out to 10cm (4in) apart, removing the weaker ones.  

Alternatively, sow two or three seeds at intervals of 10cm (4in) along the row. If more than one germinates in each group, take out the smaller seedlings to leave just one.

Seeds can be sown in a similar way in large containers at least 30cm (1ft) wide and deep, filled with multi-purpose compost.  
4

Plant Care

Salsify is slow growing, but needs little maintenance – just keep plants weed-free and water in long dry spells.


Watering

Water young seedlings regularly if conditions are dry. Once established, salsify should only need watering in long dry spells, to prevent the roots splitting.

 If growing salsify in a container, water regularly throughout the growing season.

Mulching

Apply a thick layer of garden compost around salsify plants in late spring to help prevent the soil drying out in summer and deter weed germination.  Feeding
Salsify shouldn’t need any feeding.
Weeding
Weed this slow-growing crop regularly to stop weeds getting established and outcompeting it. Use a hoe between rows, but hand weed close to the plants to avoid damaging the top of the roots.  
Pest protection
Protect salsify seedlings and young plants from slugs and snails.
5

Harvesting
Salsify roots are ready to harvest from late September. They can be left in the ground and dug up whenever required, through winter and into early spring. Frost helps to sweeten the flavour, in a similar way to parsnips.

Lift the long slender roots very carefully, as they snap easily and bleed if cut. Ease them out with a fork rather than pulling them up
From autumn onwards, protect the top from frost with a layer of straw or fleece
In very cold locations or where the soil is prone to waterlogging, lift and store the roots in sand or sawdust and keep in a cool, frost-free garage or cellar.
Salsify roots have a tough, inedible skin. Removing it can be tricky, as uncooked roots produce a sticky latex. So it’s best to cook the roots first, then peel them.  

  To enjoy the delicate oyster-like flavour, simply steam the roots, peel them, then serve with butter as a side dish. Like other winter root crops, they can also be mashed, roasted or sautéed, and added to many other hearty dishes, such as soups and stews.  

  If you leave some of the roots unharvested, salsify will re-sprout from the base in spring. These young shoots can be blanched to provide an additional crop:
In early spring, cut back the old leaves to within 2.5cm (1in) ground  
When new shoots appear, cover them with a mound of soil 10–15cm (4–6in) high, to exclude light. In heavy soil, it’s better to cover with straw or an upturned bucket
Harvest the blanched shoots as they appear above the mound, carefully clearing away the soil  
Cook them like asparagus
Spring leaves can also be cut when 15cm (6in) tall, without

blanching, but are not as tender. They can be used like spring greens.

  If left to grow, salsify will flower in its second summer – the pink-purple petals are edible and add a bright splash of colour to summer salads. The flower buds can also be steamed or sautéed.
Salsify is easy to grow and is rarely troubled by pests or diseases.  

  Slugs and snails will eat the

seedlingsand soft young shoots, so put protection in place.

  To stop the roots forking, remove stones from the ground before sowing, and don’t sow in ground that has recently been manured.  

  Keep plants well watered in dry spells, to prevent the roots splitting or becoming fibrous.

  The roots can grow very long (up to 30cm/12in) and snap easily, so take care when harvesting – use a fork to loosen the soil and lever them out gently.
Common problems
 
Bolting is the term applied to vegetable crops when they prematurely run to seed, usually making them unusable. A cold spell...
Bolting in vegetables
 
Slugs are widespread animals which can cause problems in the garden, eating holes in leaves, stems, flowers, tubers and...
Slugs
 
Snails are familiar animals that can cause a lot of damage in the garden, eating holes in leaves, stems...
Snails